New to shooting? 3 Photography Useful Tips for Beginner
Since a few years ago, we have noticed that the tremendous changes in the photography industry, influenced by the growth of social media platforms. Photography is an art that reflects the trend in our society, bringing us something interesting and inspiring.
Trends in photography change rapidly, that you need to be constantly exploring people’s interests and preferences. For example, minimalism has been photo trends for so long, simple yet meaningful inciting audiences to pay attention to the photographs and think contemplating. Another trend in photography is definitely raw shot. Changing socially-accepted standards of beauty, modern photography stick to beauty in a raw form without extra processing.
In order to get a perfect shot, it is important to look at the fundamental of photography. Let’s begin with an understanding of some photography terms and how the camera work.
1.Basic Photography and Camera Terms
# Aperture
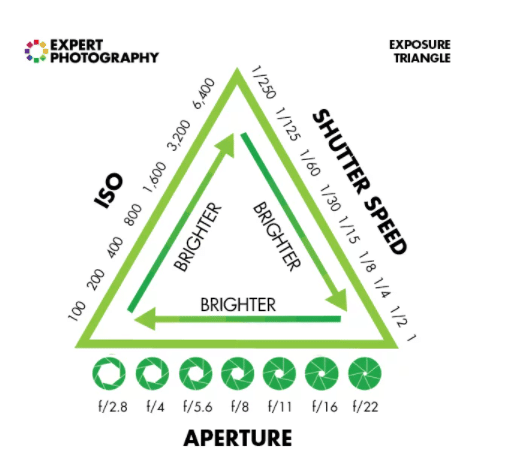
The diameter of the hole inside the lens known as the aperture. The alteration size of the hole depends on the change in an aperture which means allowing less or more light to enter the camera which will affect your final image. You can imagine the aperture as the pupil of your eyes. More light is allowed when the aperture is wider.
# Shutter speed
Shutter speed is the key element in determining which kind of photography you wanna shoot. When the light has entered the aperture, it passed the shutter. This is the time that you need to decide how much light is allowed into the camera. It is various according to what you are taking and how much light available to you.
# ISO
When the light has been filtered by the shutter speed after passed through the aperture, it reaches the sensor. If you set the ISO higher, it will be more sensitive. However, you will capture more digital noise and might decrease the image quality.
2. Photography Composition
# Rule of third
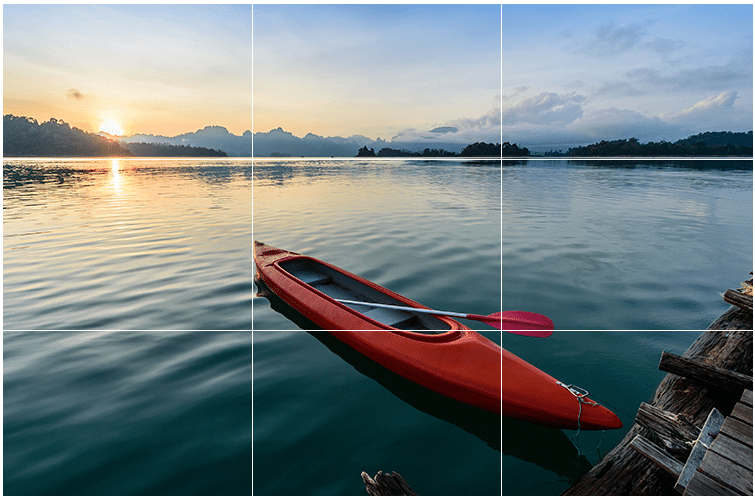
This rule of third is very easy. Most of the cameras have included the feature of display the grid in live view mode. You can divide the frame into 9 rectangles, 3 across, and 3 downs. The concept is to put the crucial elements of the scene along with one or more of the lines where they intersect.
# Symmetrical
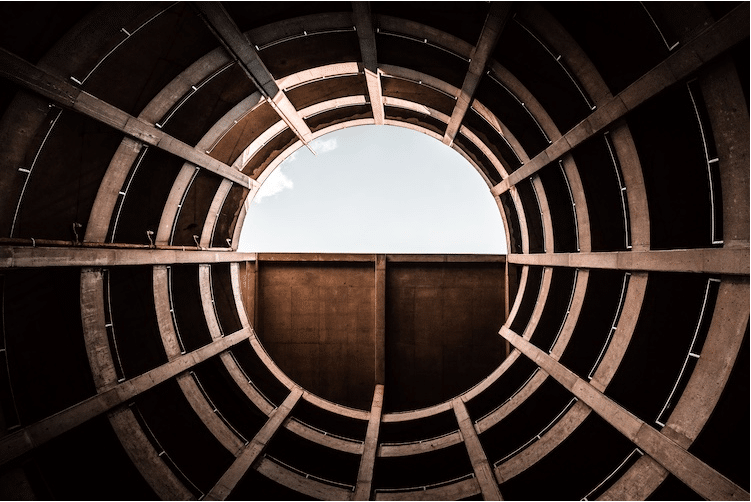
Sometimes, placing a subject in the centre of the frame works really well. When taking some symmetrical buildings or scenery, the centred composition can be a perfect shot! Roads and architecture view is definitely a great subject for this!
# frame within the frame
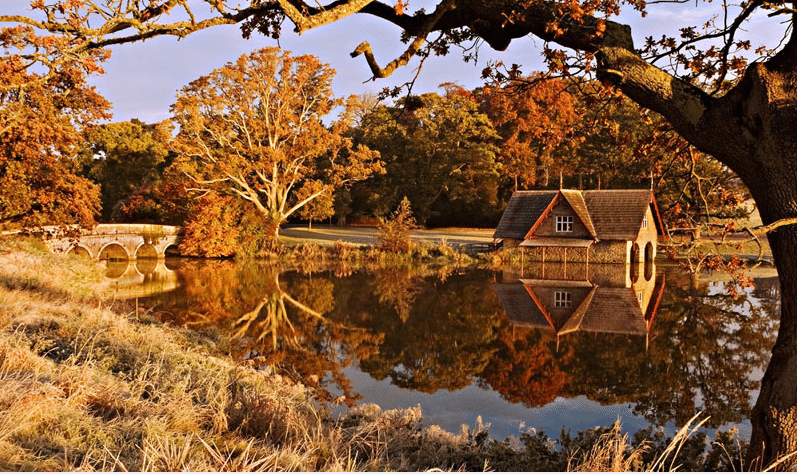
Another great way of taking a photo which is depth is scene is by including ‘frame within the frame’. You can utilise man-made objects such as arches or windows to frame the scene. Overhanging branches or tree trunk can create a frame around the whole scene to add a sense of depth.
# Leading Lines
Leading line is like a directory which helps lead the viewer to focus on important elements. Some line, paths, walls or pattern can be categorized under leading lines. It does not necessary to be a straight line, it could be curved lines that are pointing towards the right element that should be focus on.
3. Start Shooting
# Hold your camera
Learning to hold your camera properly is very important for new photographers. Camera shakes may lead to blurry images. Hold the right side of the camera with your right hand and place your left hand on top of the lend to support the weight of the camera.
# RAW format
Shooting in RAW can capture all the image data recorded by the camera’s sensor. It does not undergo compression, so you will get a higher quality image and at the same time, you will be able to correct problems such as under or overexposure. You are able to adjust contrast, temperature, and other details.
# Flashlight
Some undesired effects for instance red eyes and harsh shadow can be due to the camera’s built-in flash at night. if there is not enough light, you can adjust the flash setting in your camera’s menu and reduce the brightness. By putting something over or securing a piece of cardboard over the flash can help diffuse the light.
Whether you are looking for ways to update your photography skill or deepen your knowledge, do remember that practice makes perfect! Having an interest in product shooting? Click HERE to look for us!


