How To Make An Instagram Filter For Your Brand
Building Blocks of Instagram Filter
Before you start working on a social media plan for your business, it is necessary to understand why people are spending their time on the platform. People come to Instagram to be inspired and discover things they care about love about, so you need to:
- Connect passions – tapping into people’s passions to create a deeper relationship with your brand
- Immerse them visually – tell your story using unique creative tools and immersive formats that inspire action
- Spark exploration – connect to new customers and strengthen the relationships with the existing
There’s no better way to do all of the above than by posting on IG stories and by creating your own IG filters.
Instagram has over 1 billion active users worldwide per month, 90% of which follow a business account on Instagram and 500 million of which use Instagram Stories every day! If your brand uses Instagram for Business, take note that Instagram stories are an effective way to gain a high online exposure and therefore customer interest. Interactive features on IG Stories such as GIF Sticker, polling, ask me a question and Instagram AR Filters are fun ways for brands to engage with users.
Even cooler than just IG stories, Instagram filters allow you to add effects to selfies, making your picture look fun and cool. Anyone can create their own Instagram Filter with the Facebook-owned platform Spark AR Studio.
What is an Instagram AR Filter
Augmented reality (AR) filters are computer-generated effects designed to be superimposed on real-life images. A lot of Instagram stories filters are taking over our Instagram Stories feed recently, like the classic puppy ears, which Disney character are you and so on.
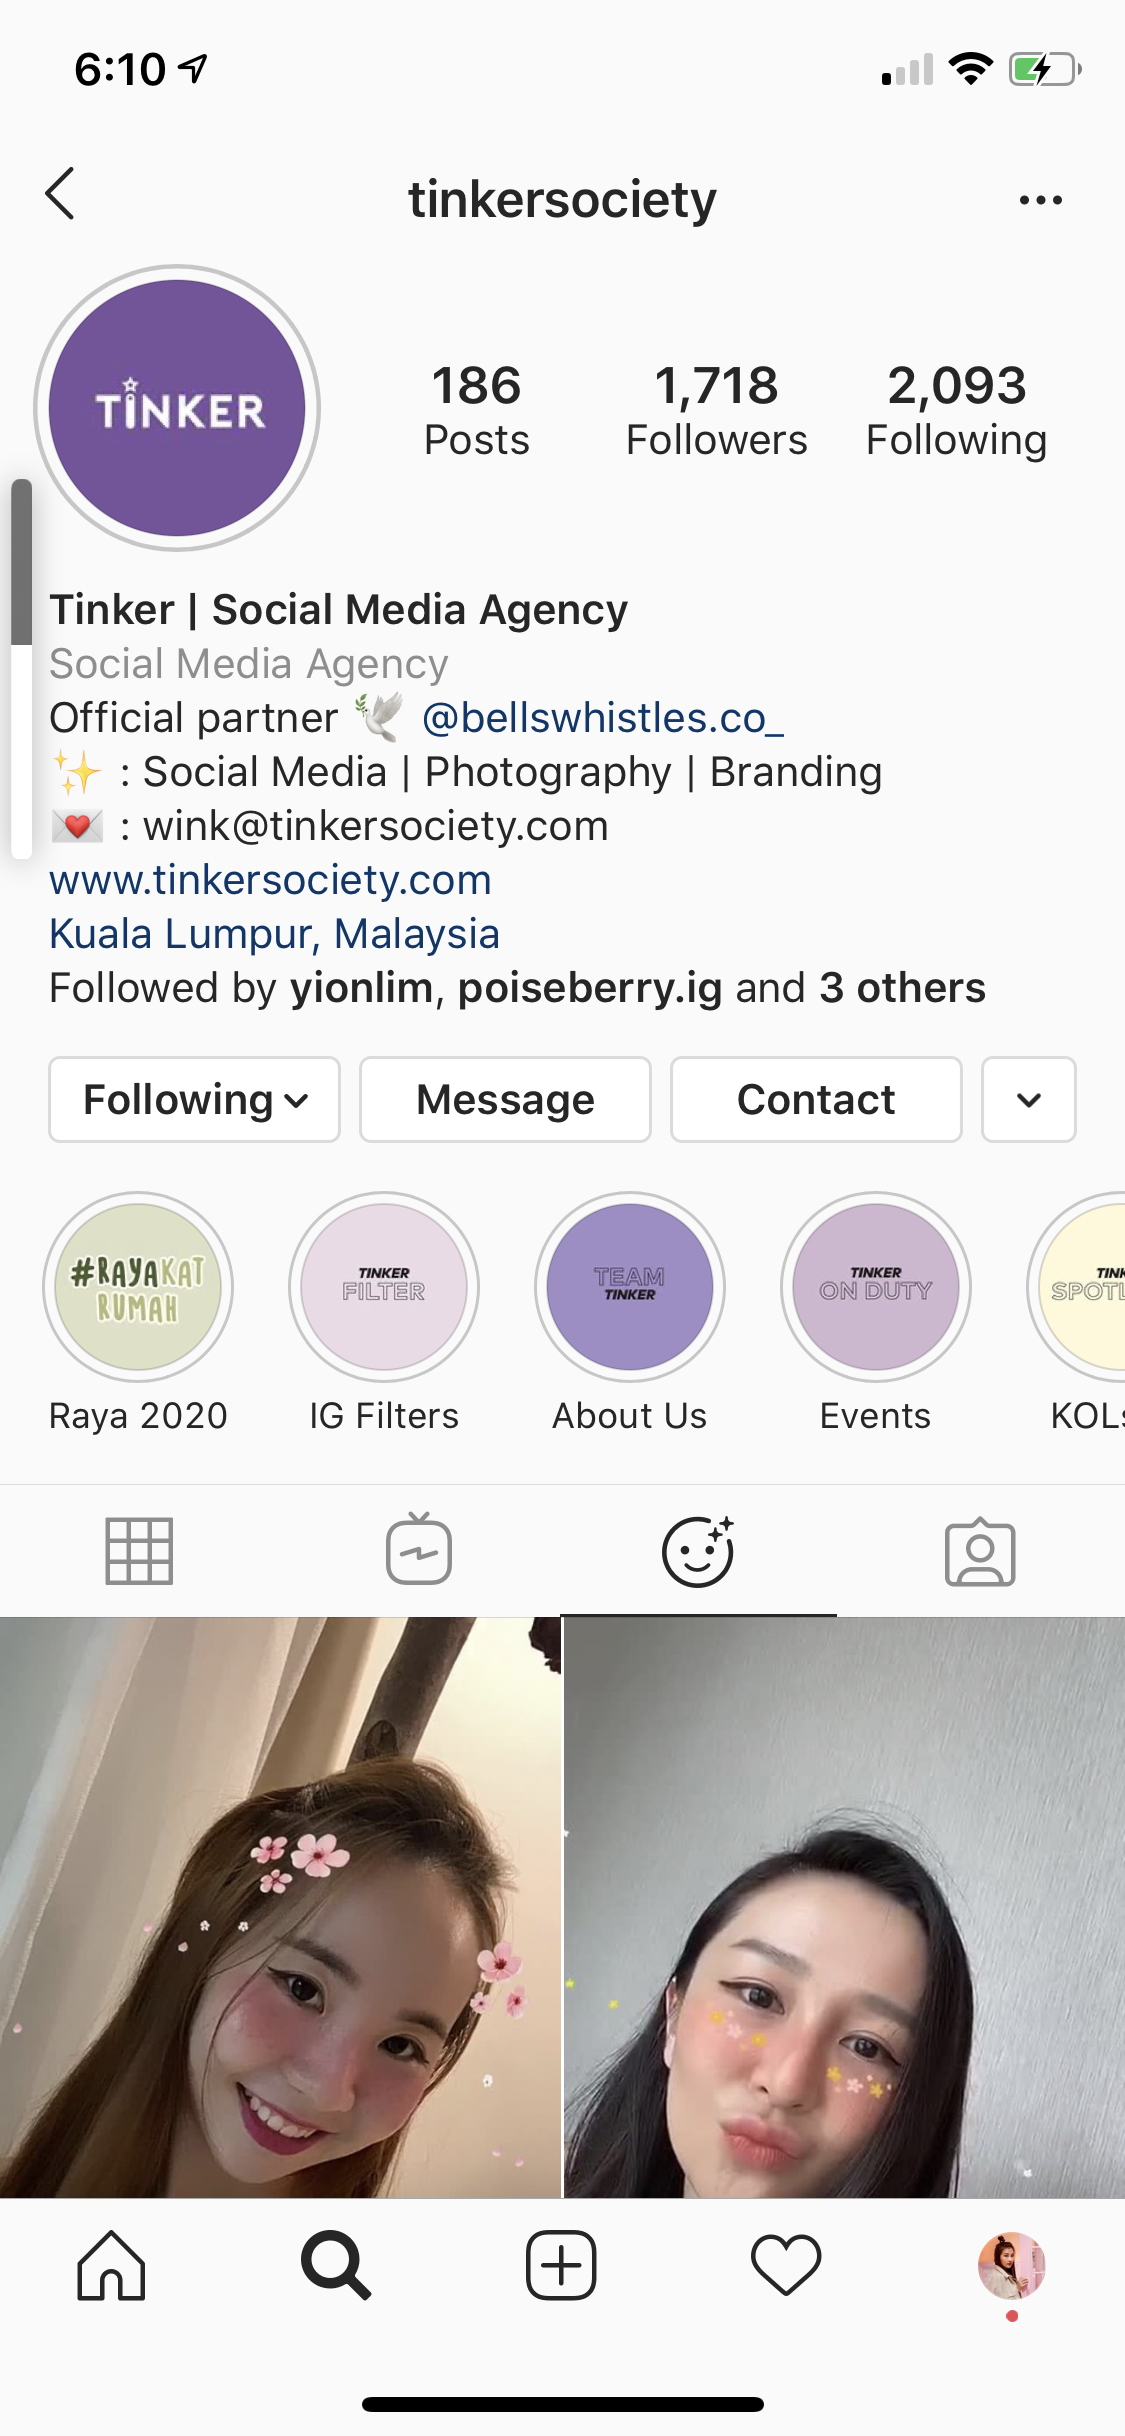
And then there’s the creative and beautifully created filter by Tinker Society, the number one social media marketing agency in Southeast Asia.


You may also head on to Tinker Society’s Instagram Profile to try out all their fun filters that are sure to make your day! 🙂 Just tap on the face icon on our Instagram feed (3rd icon from left) and our Instagram AR Filters are all yours.
Why Do We Create Instagram AR Filters For Stories?
This is one of the latest and viral tools for brands to reach the audience on the Instagram platform.
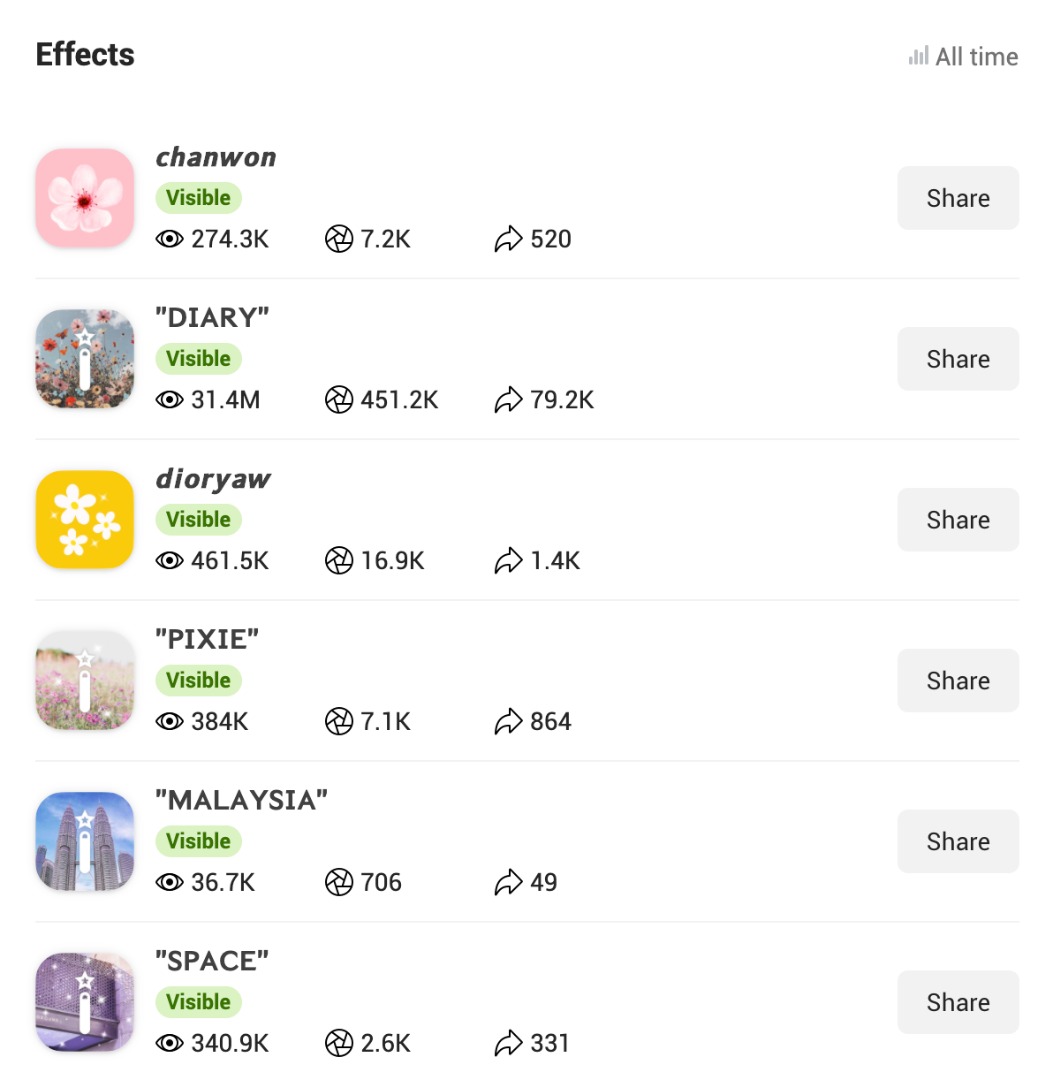
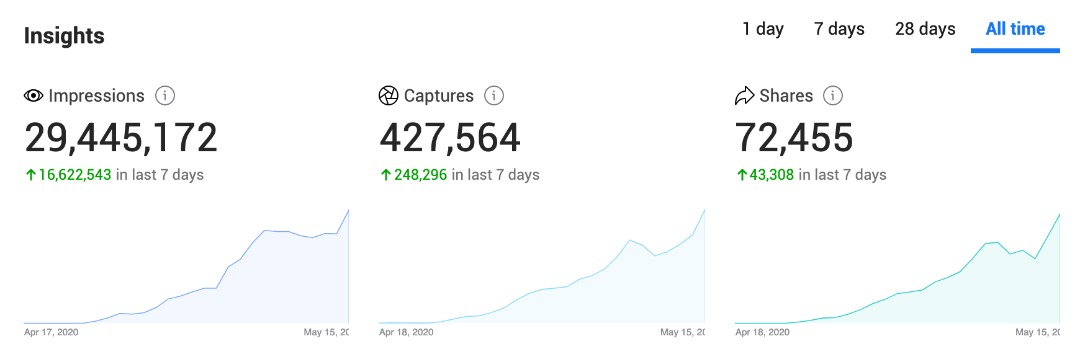
- Increase brand awareness – incorporate your branding, mascot or any element that representing your brand into the Instagram AR filter. If the filter of yours are not promotional, it will display in Instagram’s Effect Gallery organically where users can find them and use them. To see the Effect Gallery, just open your Instagram Camera, scroll to the right of the effect trays and tap Browse More Effects. When a user using your filter, their followers will be exposed to your brand or account on the top of the Instagram Stories. Here’s an insight sharing of how Tinker Society’s Custom Instagram AR Filter has been achieved and it’s still growing quickly, our “Diary” concept filter has reached 31.4 million impressions in less than a month.
- Be ahead of the trend – Customise Instagram AR Filter is still a new and developing feature and not many of the brands started using it yet as it’s a totally whole new software to learn with the knowledge to create. Some brands can create an Instagram AR Filter for the customers to virtual “try on” their products before making a purchase or creating some useful and great filters that users will love to use on their daily stories.
- Show off your brand’s personality – Customise Instagram AR Filter that reflects your brand’s personality, tone and voice. Here’s an example of how a Malaysia lifestyle brand Chucks founded by Jane Chuck a social influencer created their brand AR Instagram Filter.
How To Make An Instagram AR Filter?
Step 1: Download Spark AR Studio
Spark AR Studio is available for both Windows and MAC computer and you will need to sign in to your Facebook account to get access. Next, you may also join the Spark AR Community to have more insightful information, to ask questions and find inspirations.
Step 2: Create Your Design on Your Design Software
We going to show you how we create a customise selfie filter with makeup effect. Click here to download the asset files prepared by Spark AR to make your life easier, you may drag the files into your design and start painting it. Pick your preferred colour for light makeup for lipstick colour and blusher or maybe add freckles too!
Pre-design your elements on your design software, we were using sakura flower as the element for “Chanwon inspired” filter which we will later apply it on the headgear area. As for the square icon on the right was prepared for the filter icon.
Step 3: Start A Project on Spark AR Studio
Usually, we will start with a blank project to create a full customise filter. For a beginner, you may choose to start with any Spark AR ready template.
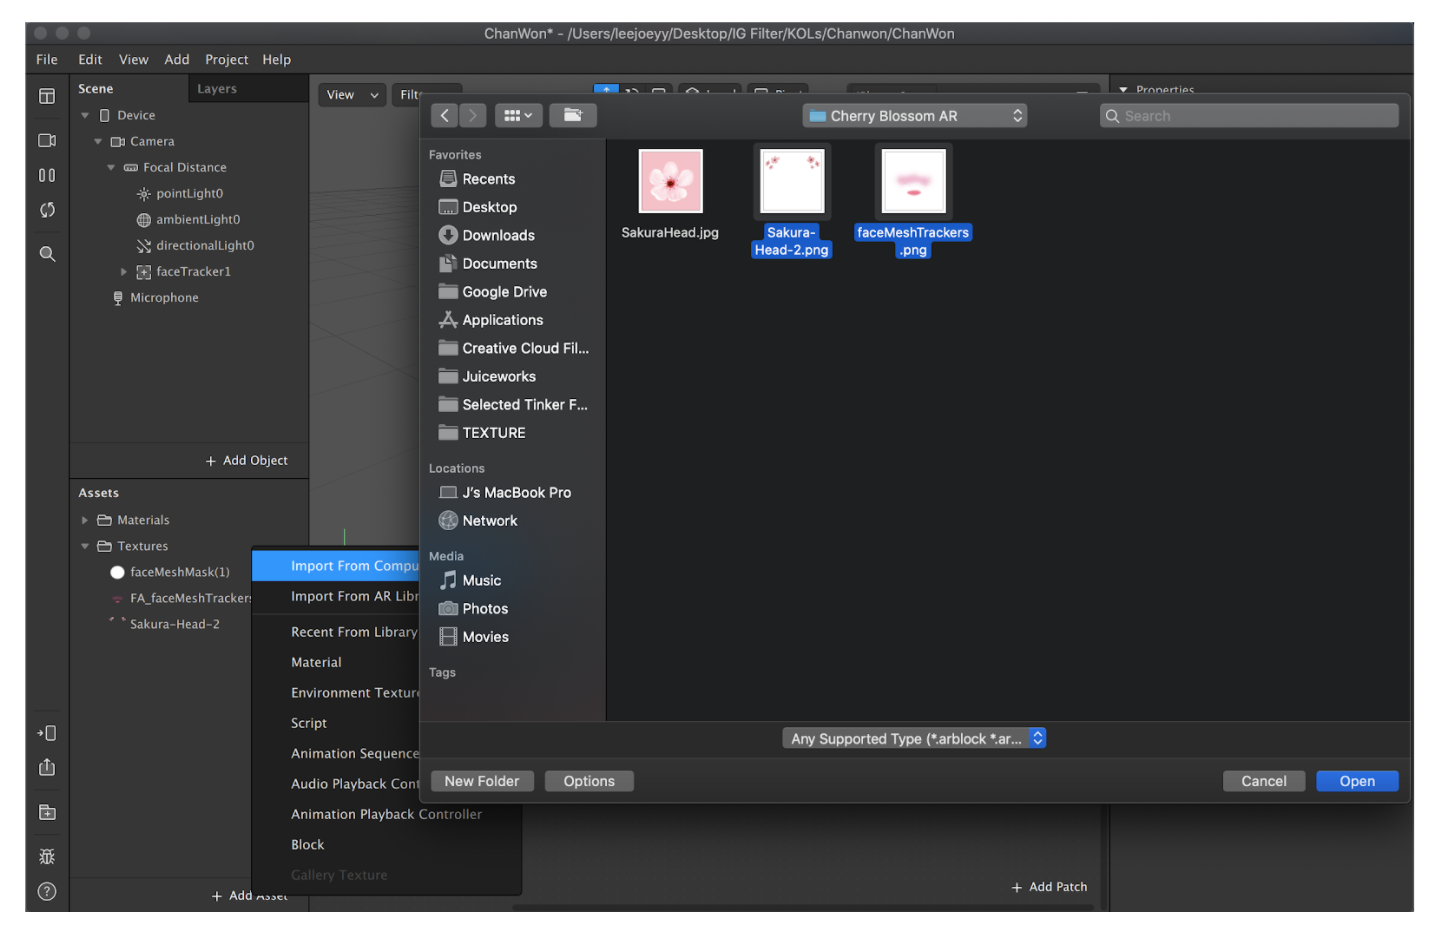
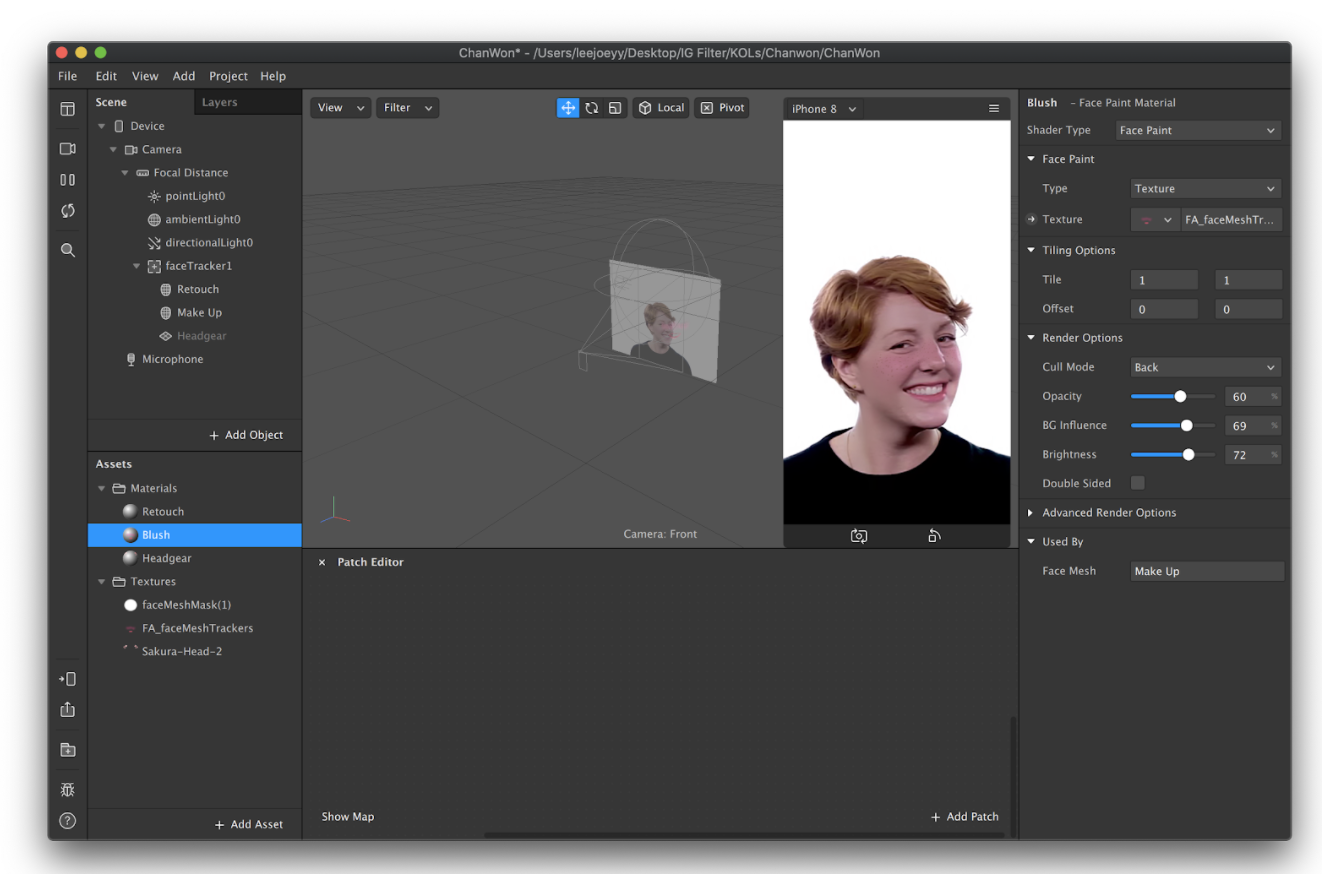
Let’s import all the ready designs we have created earlier in PNG to Spark AR. Find + Add Asset at the bottom of the software and import the sakura headgear design and makeup effect inside. An additional tip for you, make sure rename all your files and layers to keep it organised for future understanding otherwise, it will be a messed.
Next, add Face Tracker to track face figures including eyes, eyebrows, nose and lips.
Next, add Face Mesh to place effects on face, we can use up to 2 Face Mesh to create a different effect.
Step 4: Add Material
Select the Face Mesh and rename to Retouch, every time when you start a new Face Mesh or object, you will need to apply “Add Material”. At the Material bar choose “Create New Material”.
Step 5: Effect – Retouch
Once done, one the left bar rename “material0” to “Retouch” and select it. Then on the right side go to the “Shader Type” and pick “Retouching” adjust your skin smoothing. We recommend not more than 50 for being natural but not too fake beauty.
Step 6: Effect – Face Paint (Makeup)
Add a new Face Mesh, create Material and rename to Blush. On the right sidebar, select Shader Type and choose Face Paint. Next, add texture to select your makeup png. You can play around Render Options with opacity, BG of the people, and Brightness.
Step 7: Effect – Headgear (Cherry Blossom)
Add a new Face Mesh, create Material and rename to Blush. On the right sidebar, select Shader Type and choose Flat. Next, add texture and select your pre-created headgear PNG. So for us, we had picked the sakura file.
Step 8: Double Check & Adjust Position
Reposition your headgear by selecting your Face Mesh the headgear layer and adjust the headgear where you want to locate, it can be on top of your head hanging around.
Step 9: Test On Your Instagram
Once it’s all done, you can test it on your Instagram! On the left sidebar, select the “Phone Icon” and send to Instagram Camera to try it. Otherwise, you can copy the link and use the link to try on Instagram. Remember to send to some of your friends to try it to get honest feedback from them for you to fine-tune the end result!
Step 10: Upload Your Filter To Spark AR
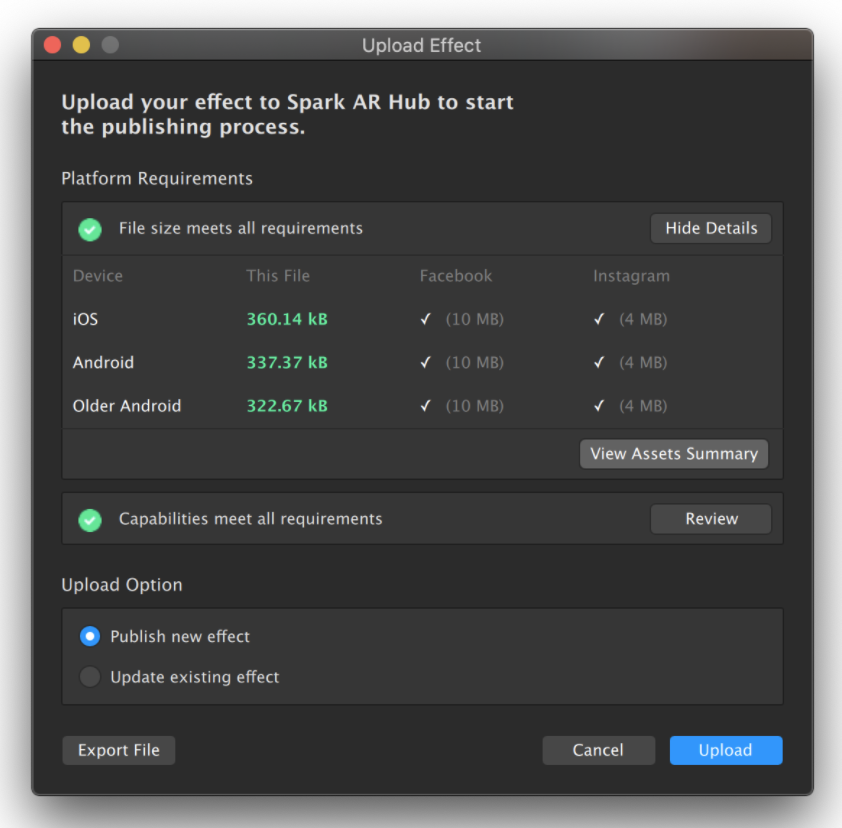
Do the last round requirement check to make sure it passed all the requirements (eg: files not too big) in order to upload to Spark AR.
Next, prepare to submit for final approval and here’s the steps:
- Fill in your filter name and details
- Upload the icon design earlier
- Prepare a demo around 6-10 seconds for filter preview purpose
- Write a rationale for your filter, what it is about, what inspired you to create this filter for team Spark AR to read and approve.
Once done, just wait for the approval and normally it takes around 1-2 days to approve!
Are you ready to get started? Download Spark AR to try it now.
Alternatively, you can also engage agency like us to create customise Instagram filter for you. Just reach out to us at wink@tinkersociety.com.


